
Office
(212) 832-5456 115 East 61st Street,New York, NY 10065
Surgical center
225 East 64th Street,New York, NY 10065
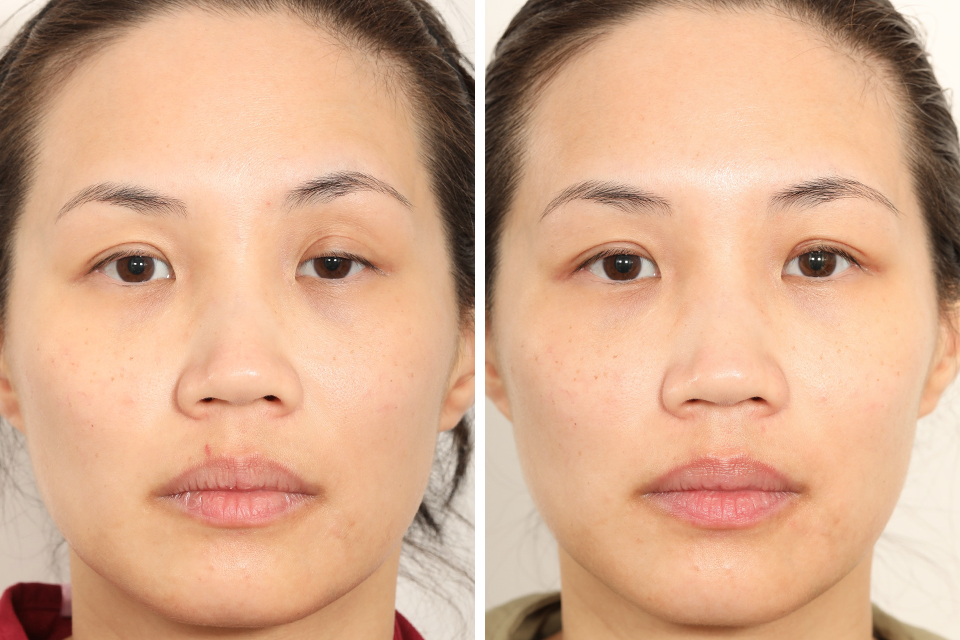
Gallery
Dr. Jessica Lattman
CONTACT

Office
(212) 832-5456 115 East 61st Street,Surgical center
225 East 64th Street,Dr. Jessica Lattman